How a Vibrator Helped Me Debug a Motorcycle Brake Light System
Harry GillShare
I wrote about how BrakeBright came to be in my previous blog post, "My Quest to Make Motorcycle Riding Safer...". Give it a read if you're curious about the backstory. Since launch, riders from dozens of countries have picked up the device, and the feedback has been overwhelmingly positive.
This support drives me to keep improving it. That’s exactly why BrakeBright has a built-in USB port, to deliver firmware updates, new features, and performance improvements to every rider, for free.
Along with feedback from users, I’ve been out testing the device myself. A few weeks back, I took a ride from Glasgow to Birmingham, mostly hammering down motorways. That trip helped resurface a specific edge case I’d seen before: at constant high speeds, the brake light would occasionally flicker briefly, even without any real slowing down. I had already tuned things to reduce this after shorter rides, but this long haul proved it wasn’t fully sorted. It was a rare false positive, but one worth chasing.
Hardware is blind: The motion sensor is a dumb little chip, it doesn’t know squat about what’s actually going on. It just feels G-forces and spits out numbers. Whether that force is from braking, a pothole, or some sketchy engine buzz, the sensor treats it all the same.
So it’s up to me to decode that chaos. Early on, I tried not reacting to single spikes. Instead, I sampled over short windows and averaged the data. That helped cut down the noise from little bumps and jitter.
But averaging had flaws. One good hit from a pothole or a weird engine vibe could still skew everything. And the average isn’t a clean snapshot, it’s a mix, outliers and all. So while the data looked smoother, the false positives didn’t go away.
Then I tried a low pass filter. This smoothed things out even more, letting gradual changes through while cutting off sharp spikes. That helped a lot. Less twitchy, more stable.
Still, I wanted better. I switched to using the median instead of the average. The median ignores the outliers and shows you what’s happening in the middle of the data range. That gave me something way closer to the real ride behaviour. It made the system much tougher, especially at speed or over rough roads.
I was feeling good about that setup. On short test runs, it behaved exactly how I wanted. Then came that Glasgow to Birmingham ride, and that’s where things got real.
Sample Timing Matters: Let’s say your engine’s spinning at 5000 RPM. On a 270-degree crank twin, that means the thing fires off pulses roughly every 9ms and 15ms. A full revolution takes 12ms. If the sensor polling lines up just right with those intervals, it starts syncing with the engine buzz instead of filtering it out. Suddenly, your brake light thinks you’re slowing down when you're actually just cruising.
So not only does the code need brains, it needs rhythm. Read the sensor too fast and you grab static. Too slow and you miss the good stuff. Get the timing wrong and you're chasing ghosts.
To dodge that sync trap, I added a bit of jitter to the sampling interval. Instead of checking the sensor on a perfect beat, the system now throws in a bit of randomness. This keeps it from falling into step with the engine pulses. That one tweak cut false positives even further.
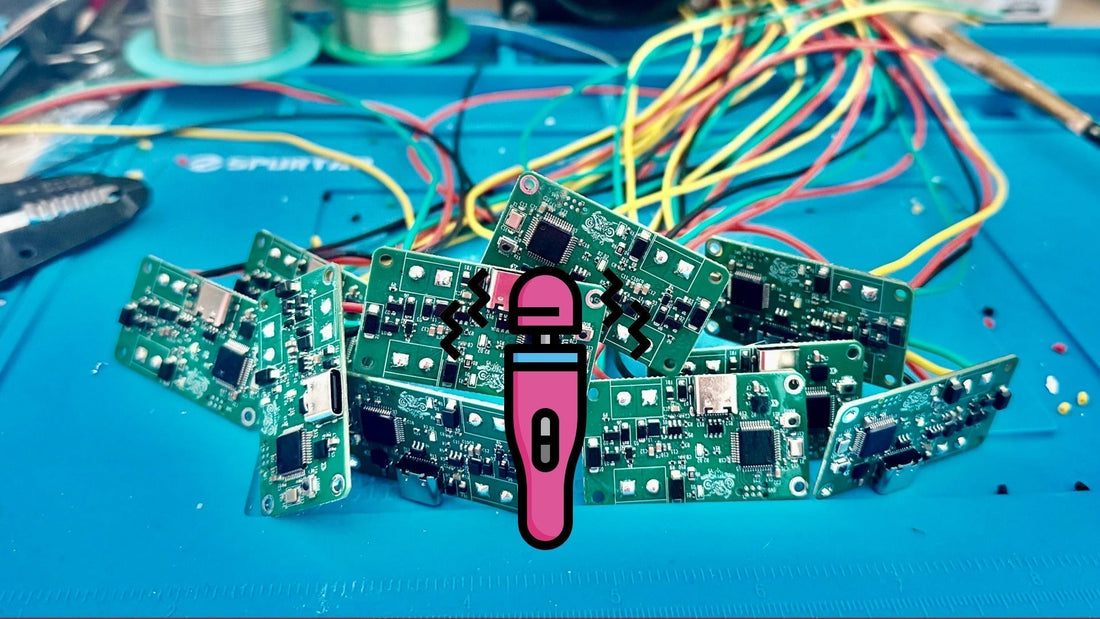
Sex Toy to The Rescue: Here’s the catch, real-world testing takes time. Motorway is an hour out from where I live. Each tweak meant hopping on the bike and carving out hours to test. I don’t mind the ride, but it slows down development.
So I needed a cheat code. Enter: a repurposed vibrator, No joke. I hooked it up to mimic the kind of high-frequency engine vibes you'd get ripping down a motorway. It wasn’t pretty, but it worked. I could test tweaks right from my test bench.
One day, my wife hears this buzzing from my office and pokes her head in. I tell her I’m “testing.” We both lose it laughing. Just one of those moments you don’t forget.
The current solution: The jitter helped, but it wasn’t bulletproof. Then I realized something deeper, the sensor has its own built-in sample rate, 400 times per second. If I read it too quickly, I might just be grabbing the same number twice. No new data. And if that repeat looks like a sustained deceleration, the light fires.
So I stopped focusing just on when I sample, and looked at how I trigger the light.
Now, when the system sees signs of braking, it doesn’t flash right away. It waits just a moment to see if the reading holds or grows. If it does, then the light kicks in. This debounce delay is short, but enough to filter out garbage without slowing down legit signals.
And here’s where it gets smart: if the light turns on and shuts off in under a second, the system assumes it just saw a false positive as a real decelerating or braking event would last much longer than a second. It bumps up the debounce for next time. That usually means we’re riding through vibration hell and we should take our time to turn on the light.
But when things are smooth for a while, the debounce comes back down, keeping the system snappy when it’s safe to be.
BrakeBright has gotten sharper, faster, and a whole lot smarter, but the mission isn’t done. I’m still learning, still testing, still riding. Every update comes from real roads, real bugs, and a stubborn refusal to settle.
If you enjoyed this story, share it around. If you’re a rider, consider picking up a unit and supporting what I’m building. Your feedback fuels this thing and your brake light might just get smarter because of it.
📣Special Discount📣: Use code BLOG20 for additional 20% off your order! 👇👇👇

